A Bayesian Network in 2 minutes
In this tutorial about creating a simple Discrete Bayesian Network(BN). The resultant is the BN of the Probabilistic Graphical Models course. The student network:
Run Sally-BN
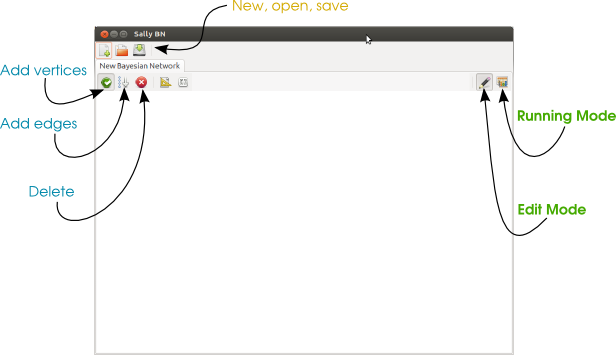
Install and run Sally-BN (more information about installation Installation). The main window and the buttons descriptions are the next:
1. Creating variables
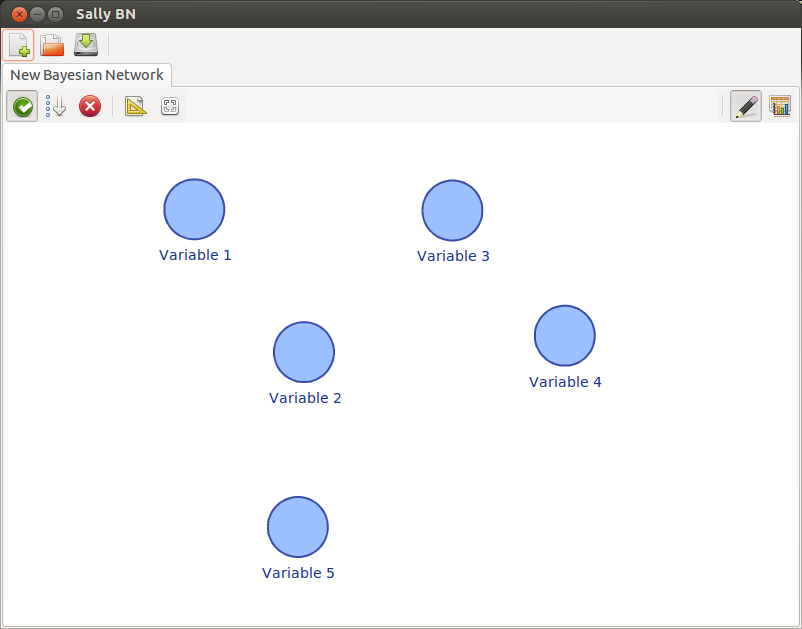
The initial step is defining the variables (represented as vertices) of the Bayesian Network. Just click on the button “Add vertices” and click on the white space to create a node. The result of doing it five times looks like this:
2. Connecting variables
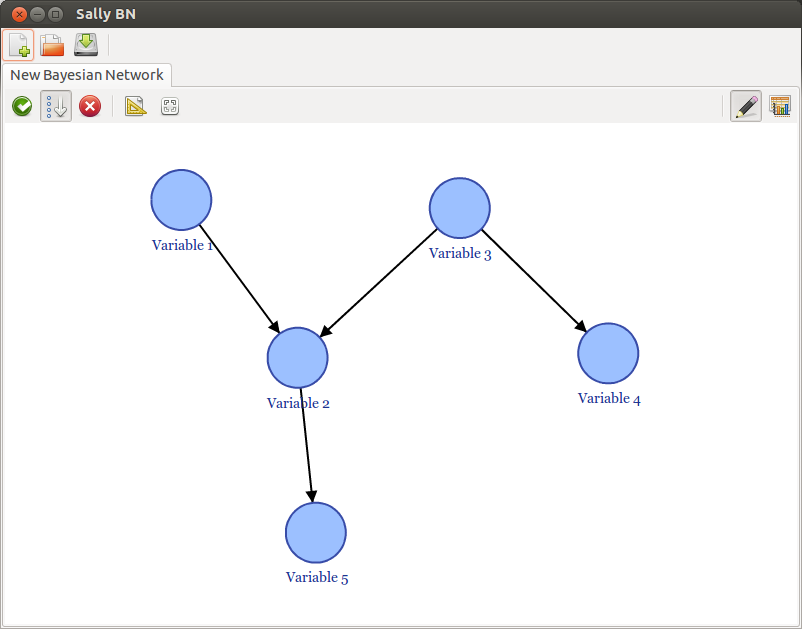
Click on the button “Add edges”. Then, click on the source vertex (cause) and click on the target node (effect). It defines the relationship between two vertices, where the source vertex is the cause and the target is the effect. The result should look like this:
3. Defining variable names and distributions
To edit the vertex attributes, double click on vertex “Variable 1”. It must show the window:
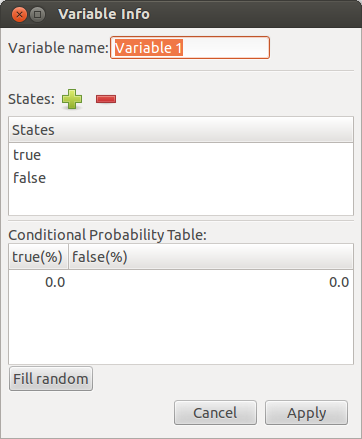
Edit the form with the params below:
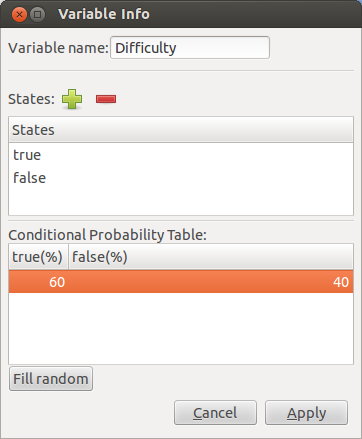
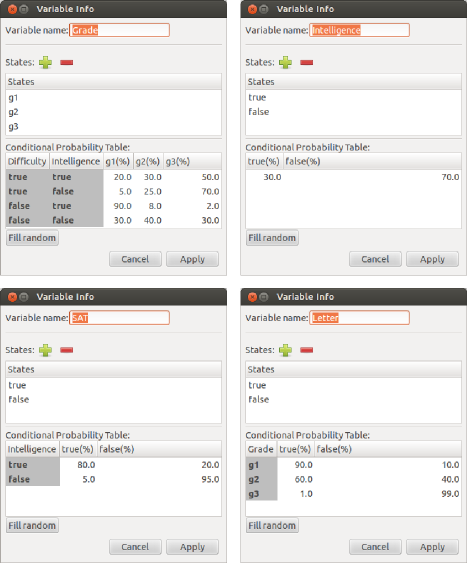
By the same way, edit variables 2, 3 ,4, and 5:
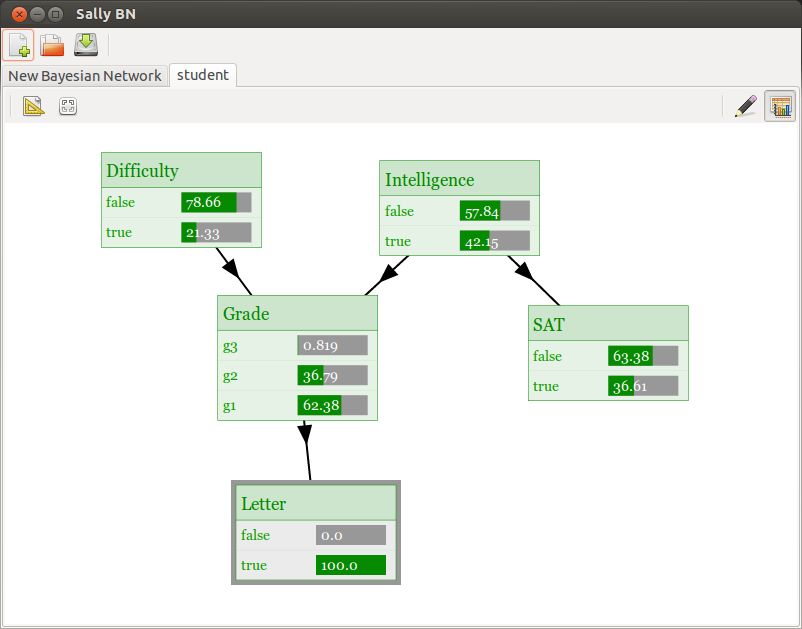
4. Solve the Bayesian Network
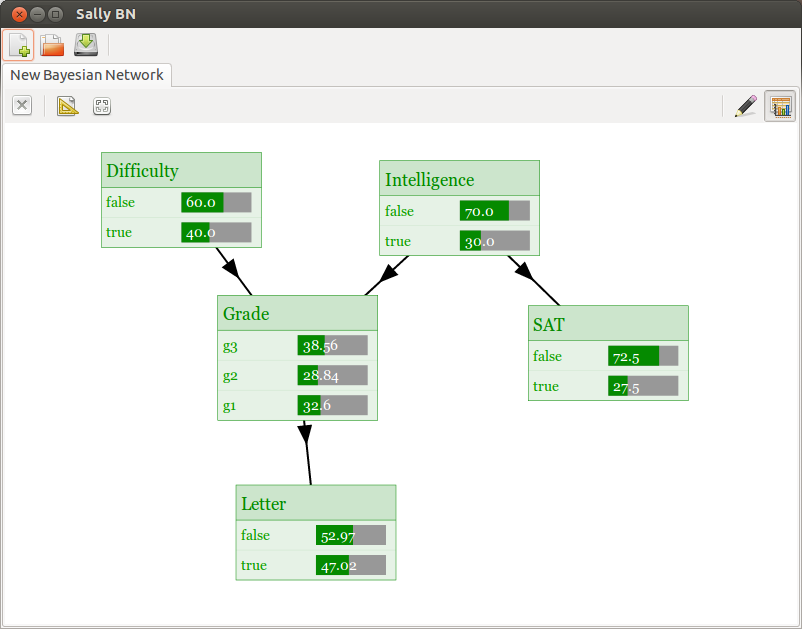
Click on the button solve mode to validate the network and compute the marginal distributions:
5. Add evidences
Simply click over the state that you want to add evidence. For example, click on the state False of the variable Letter. Then, all the marginal probabilities are updated automatically:
Congratulations!! You have created and solved your first Bayesian Network in Sally-BN!